Everything You’ll Need
| Tool/Material | Glue-Down | Purpose |
|---|---|---|
| Utility Knife | ✔ | Cut flooring/padding |
| Tape Measure | ✔ | Measure size |
| Straight Edge | ✔ | Make straight cuts |
| Chalk Line | ✔ | Mark lines |
| Pry Bar | ✔ | Take away baseboards/flooring |
| Knee Pads | ✔ | Keep knees safe |
| Carpet Adhesive | ✔ | Stick flooring |
| Staple Gun | ✔ | Hold underlay (wood only) |
| Seaming Tape & Iron | ✔ | Connect seams |
| Stair Tool | ✔ | Tuck edges |
| Carpet Roller | ✔ | Press flooring down |
For concrete floors: use cement filler, construction glue, masonry nails.
Quick Notes:
- Glue-down flooring skips the stretcher but needs glue and a roller to keep it secure.
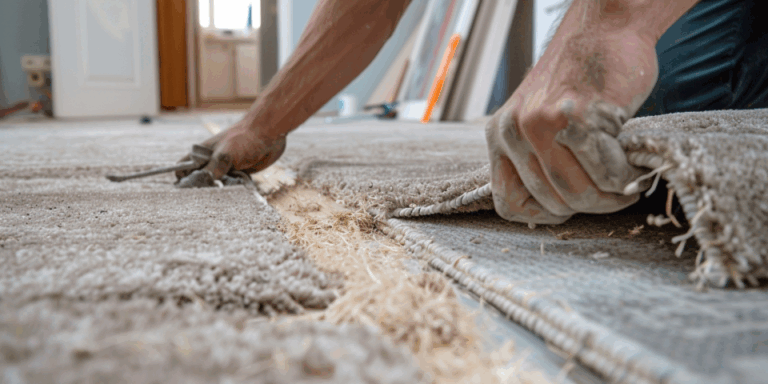
Step 1: Removing Old Flooring
Before installing new flooring, remove the old one. Whether it’s hardwood, vinyl, laminate, or tile, ensure everything is taken out. This sets up the area for your new floor.
Step 2: Subfloor Preparation
Before putting in new flooring, take out the old one and clean the subfloor. Look for any damage or moisture problems.
Repairing Damage and Uneven Areas
Spot cracks, holes, or gaps and fill them. For wooden subfloors, apply wood filler to gaps or cracks and sand it smooth after it dries.
For concrete subfloors, use a cement-based filler for cracks. Identify high or low areas and apply a leveling compound to even out the surface.
Fixing these problems properly can prevent future issues in uneven spots.
Checking for Moisture
Inspect the subfloor for moisture, especially if it’s concrete. Too much moisture can lead to mold, mildew, and damage.
Use a moisture meter to check levels. If they’re too high, address the issue first.
You might need a moisture barrier or sealant to keep it dry. Properly checking and fixing moisture levels helps prevent future problems.
Step 3: Measuring the Room
Before getting flooring, measure your room carefully. Check the length and width, plus any odd shapes or alcoves.
Add about 4 inches to your measurements for wall changes and cutting needs.
Handling Odd Shapes
These shapes can make installation tricky and affect how the flooring looks. Here are some common issues you might face:
Alcoves and Bay Windows
Alcoves and bay windows change the room’s shape. These areas need exact measuring and extra flooring pieces for full coverage.
Closets and Doorways
Closets and doorways can break up the main flooring area. Doorways often need special transitions, and closets might need smaller flooring pieces.
Angled Walls and Corners
Rooms may not have straight walls. Angled walls and corners need precise cutting for the flooring to fit well.
Columns and Built-In Features
Columns or built-in items like bookshelves can block the flooring path. These need exact cutting around their base for a seamless look.
Irregular Room Shapes
L-shaped or T-shaped rooms need more complex measuring and cutting to fit the flooring correctly.
Steps and Staircases
Steps or staircases add challenge. Each step needs measuring and covering to ensure a smooth transition.
Nooks and Crannies
Small nooks and crannies need care. Measure these areas and cut flooring pieces to fit them well.
Step 4: Calculating Square Footage
To find the square footage of a room, multiply the length by the width. This tells you how much flooring is needed.
For instance, if your room measures 10 by 20 ft, multiply 10 by 20, which equals 200 sq ft.
Step 5: Installing Tack Strips
Tack strips hold carpet edges to the floor. They have small nails to keep the carpet in place.
Tack Strips on Wood

To install tack strips on wood floors, use a hammer or nail gun. Space them evenly along the room’s edge, leaving a gap from the wall.
Tack Strips on Concrete

Installing tack strips on concrete is a bit different. Apply construction glue to the back of the strip, press it onto the floor, and secure it with masonry nails.
Step 6: Choosing and securing the Right Underlay
When placing the underlay, lay it in the opposite direction to where you will lay your flooring.
Types of Underlay
There are various kinds of underlay, each offering its own comfort and support:
Foam Underlay
Foam underlay is favored for being light and affordable. It provides soft cushioning and absorbs impact, ideal for busy areas.
Rubber Underlay
Rubber underlay is very durable and long-lasting. It supports flooring well and reduces noise between floors, great for multi-level homes.
Felt Underlay
Felt underlay feels plush and absorbs sound. Made from compressed fibers, it offers soft cushioning and makes spaces quieter.
Secure the Underlay
Use a staple gun to pin the underlay to the floor, ensuring it’s flat and smooth. Overlap the edges to prevent gaps.
Factors to Consider when Choosing Underlayment
| Aspect | Consideration |
|---|---|
| Flooring Type | Different floors might need different underlays for the best results. |
| Level of Foot Traffic | In busy areas, pick a dense and strong underlay that won’t flatten easily. |
| Noise Reduction | Choose underlays like rubber or felt to lessen noise between floors, making areas quieter. |
| Special Requirements | If using underfloor heating, select an underlay with good thermal insulation for energy efficiency. |
Step 7: Cutting the Carpet
Getting Your Flooring Ready
Before installing flooring, ensure it fits well. Cutting it right makes it look nice. Here’s how to do it:
Measuring and Marking
- Place the flooring in the room where it will be installed.
- Leave a bit extra at the walls for trimming.
- Use chalk or a pencil to mark measurements on the back as a guide.
Techniques
- Straight cuts: Use a utility knife and a straightedge to cut along marked lines. Press firmly for a clean cut.
- Corner cuts: For corners, make diagonal cuts for a smooth fit between walls.
- Trimming excess: Trim extra material along edges with a utility knife, making precise cuts for a neat finish.
Extra Tips
- Check measurements twice before cutting to avoid mistakes.
- Be careful and patient when cutting; don’t hurry.
- Change dull blades for clean cuts.
- Cut away from your body and keep fingers safe from the blade.
Step 8: Stretching the Carpet
Flooring Installation
Use tools such as a knee kicker to fit flooring tightly across the room. Start in the middle and work towards the edges, making sure it attaches well.
Adding a Door Bar
Once the flooring is installed, place a door bar at doorways or thresholds. This helps create a smooth change between rooms and keeps the flooring stable.
Step 9: Seaming Carpet
Flooring Options
We have different types of flooring. Here are some easy installation tips:
- Use tools to fit the flooring snugly at edges and seams. Begin in the center and move to the walls.
- Put sealant on the edges before joining them to prevent unraveling.
- Press the seams firmly with a roller. Roll from the center outwards.
- Avoid seams in busy areas. If needed, place them across the main traffic direction.
DIY vs. Professional Carpet Installation
Before starting your project, decide if you want to do it yourself or hire a professional.
| Option | Pros | Cons |
|---|---|---|
| DIY Installation | – Costs less – Choose your own time – Feel proud of your work | – Need special tools – Hard to learn – Mistakes can cost a lot |
| Professional Installation | – Perfect finish – Fast and efficient – Often has a warranty | – Costs more – Less flexible timing |
DIY is best if:
- You’re working on small rooms.
- You have the tools or can rent them.
- You’re okay with measuring and cutting.
Hire a pro if:
- The area is large or oddly shaped.
- You want long-lasting results.
✅ Tip: Even if you DIY, think about hiring a pro for hard parts.
Need help with installation?
Our flooring installation team can handle everything. You can request a free estimate today to make it easy!
Common mistakes to avoid when installing carpet
Avoid common mistakes to keep your flooring looking nice. Take your time with each step.
- Preparing seams poorly: This can show lines or gaps. Align and secure seams well.
- Skipping subfloor cleaning and leveling: Leads to an uneven floor. Ensure the subfloor is clean, dry, and smooth.
- Inaccurate measurements: Might mean buying too much or too little. Check measurements carefully.
- Choosing the wrong underlay: Affects durability and comfort. Pick an underlay that suits the flooring and room.
- Improper tack strip installation: Leads to loose edges. Place tack strips securely.
- Not stretching the material: Causes wrinkles. Use a knee kicker or power stretcher for a snug fit.
- Ignoring room conditions: Changes in temperature or humidity can cause problems. Prepare the room before starting.
- No expansion gap at walls: Can cause buckling. Leave a small gap between the flooring and walls.
We offer financing options and welcome you to visit our showroom for all your flooring needs, including Hardwood, Hardwood Refinishing, Luxury Vinyl, Laminate, and Tile.
Do You Need Help With Your Carpet Installation Project?
Now that you’ve learned about flooring installation, you’re ready to make your space cozy and comfy. But if you’d like the experts to handle it, we’re here for you.
Our flooring installation team manages everything — from preparing the subfloor to precise installation — so you can relax and enjoy a perfect result. We will also assist you in selecting the best flooring style for your home and budget.
Contact us today to book your free in-home consultation and check if we serve your area.